Download and Install Android Studio on your pc
download and install android studio on your computer. hey what’s up guys this is madhusudan from studyviewer and today I’m going to show you how to download and install Android studio on your PC properly. Android Studio is the android’s official IDE (integrated development environment) for developing android application. it’s based on IntelliJ IDEA. using android studio you can develop your android application.here is a complete guide on how to download and install android studio on your computer.
Minimum Requirements to install android studio on your computer
- Microsoft® Windows® 10/8/7/Vista/2003 (32 or 64-bit).
- 4 GB RAM minimum.
- 4 GB of available disk space minimum.
- 1280 x 800 minimum screen resolution
Install and Set up Android Studio
Follow this method to download and install android studio on your windows computer. However If you want to install it on any Ubuntu or Debian based llnux machines, then click on this Link.
- Step 1:
First, go to developar.android.com website to download the latest version android studio.
Then you will see a button to download android studio. Click on the download android studio button.
now click on the checkbox “I have read and agree with the above terms and conditions”. and click on download android studio for windows.it’s going to download a .exe file for you.
- Step 2:
Once that’s downloaded. then double click on the android studio.exe file to launch it. then It will prompt the following dialogue box. now click on the next button.
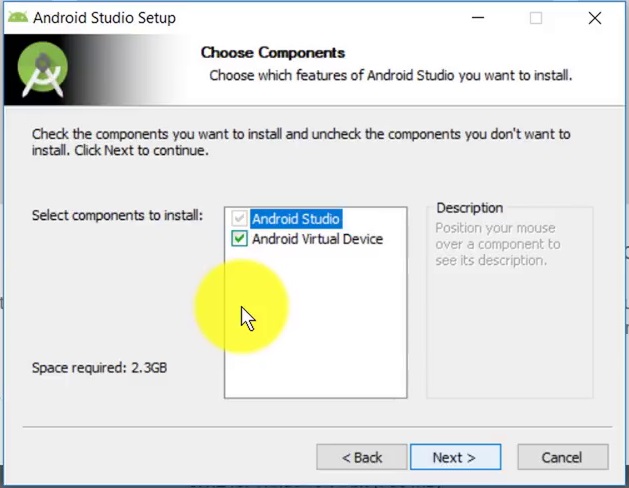
now the next dialogue box shows you which features of Android studio you want to install. if you do not want to install the android virtual device(ADV) then uncheck the checkbox. I recommend you to keep the default setting. after click next Button.
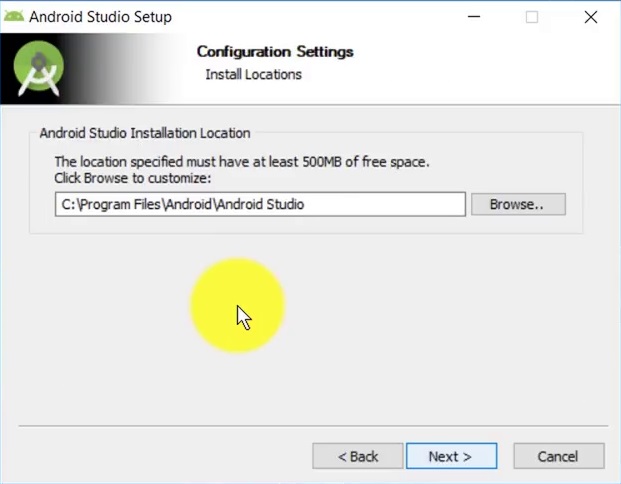
then the next dialogue box show you choose install location where to install android studio. kept the default install location and then click on the next button. the installation location must have at last 500 MB free space.
now choose the start menu folder panel. I recommend you to keep the default setting. now click on Install button.
Then it will start the installing process after the installing process is done. it goes to the extracting after extracting is completed you have to click on the next and then Finish button.
- Step 3:
now you have to good internet connection because you need to download some data.if you have any older files then that offers the option to import the older file. if you don’t have then select “do not import setting” then click on the OK button.
after android studio will start. this will take some time depending on your PC so wait and now click on next.Now choose the standard option and click on next button. then choose the theme and click on the next button.
- Step 4:
simple click on “Start New Project” to Build Your first android application.
Hope you liked this article on download and install android studio on your computer. If you have any question to ask, feel free to comment below. I will help you. If you liked this tutorial, please don’t forgot to share with your friends.


