Count Down Timer Code for Android Studio
Welcome. Here in this post you will learn how to add a Count Down Timer in Android Studio.
Count Down Timer Example for Android Studio
A count down timer works exactly as a timer that runs for the time given by you and stops automatically after the given time. Basically it is used to create any count down event and perform any task after the time is over.
Adding a Count Down timer in your App
Adding a countdown timer is very simple, just add these two lines of code in your app:-
|
1 2 3 |
CountDownTimer timer; timer = new CountDownTimerClass(10000, 1000); timer.start(); |
Here the first time (10000 in our example) shows after how much time (in milliseconds) the timer will expire. And the second time shows the tick after how much time each tick will be counted (also in milliseconds).
A countdown Timer has some common functions, and they are:-
1. onTick (long millisUntilFinished )
This will perform an operation once after every tick occurs. The milisUntilFinished variable gives us the time remaining (in milliseconds) until the timer is over.
2. onFinish()
This method is used to perform any operation after the time is over and the timer has done its job.
3. cancel()
As the name suggests, this function is used to simply cancel the count down timer.
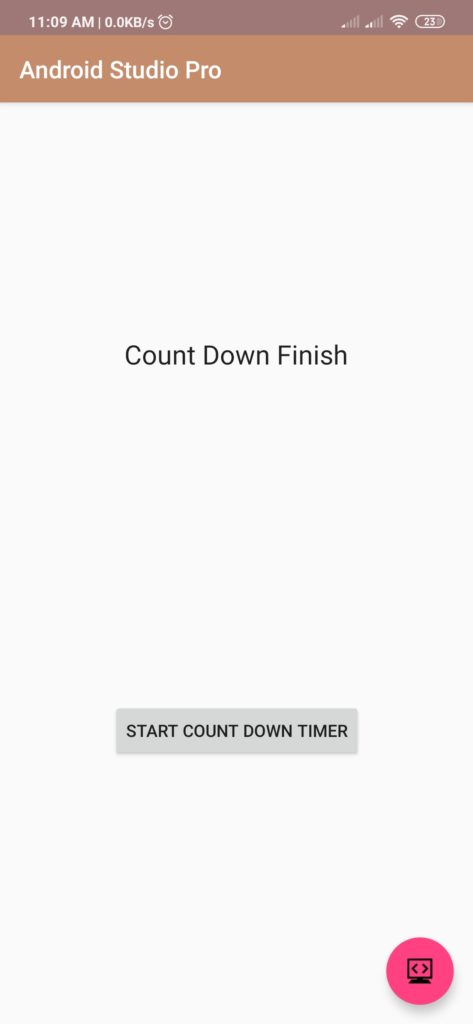
An image is shown below which demonstrates a countdown timer in action:-
The Full Java Code along with the XML layout for the above example is shown below:-
- First Create a new project in Android Studio
- File ⇒ New Android ⇒ Application Project
- Then Open src -> package -> MainActivity.java and then add following code :
JAVA (MainActivity.java)
|
1 2 3 4 5 6 7 8 9 10 11 12 13 14 15 16 17 18 19 20 21 22 23 24 25 26 27 28 29 30 31 32 33 34 35 36 37 38 39 40 41 42 43 44 45 46 47 48 49 |
import android.os.CountDownTimer; import android.support.v7.app.AppCompatActivity; import android.os.Bundle; import android.view.View; import android.widget.Button; import android.widget.TextView; public class CountdownTimer extends AppCompatActivity { Button button; TextView textview; CountDownTimer timer; @Override protected void onCreate(Bundle savedInstanceState) { super.onCreate(savedInstanceState); setContentView(R.layout.activity_countdown_timer); button = (Button)findViewById(R.id.button1); textview = (TextView)findViewById(R.id.textView1); button.setOnClickListener(new View.OnClickListener() { @Override public void onClick(View v) { timer = new CountDownTimerClass(10000, 1000); timer.start(); } }); } public class CountDownTimerClass extends CountDownTimer { public CountDownTimerClass(long millisInFuture, long countDownInterval) { super(millisInFuture, countDownInterval); } @Override public void onTick(long millisUntilFinished) { int progress = (int) (millisUntilFinished/1000); textview.setText(Integer.toString(progress)); } @Override public void onFinish() { textview.setText(" Count Down Finish "); } } } |
- Now Open res -> layout -> activity_main.xml and then add following code :
XML (activity_main.xml)
|
1 2 3 4 5 6 7 8 9 10 11 12 13 14 15 16 17 18 19 20 21 22 23 24 |
<RelativeLayout xmlns:android="http://schemas.android.com/apk/res/android" xmlns:tools="http://schemas.android.com/tools" android:layout_width="match_parent" android:layout_height="match_parent" > <TextView android:id="@+id/textView1" android:layout_width="wrap_content" android:layout_height="wrap_content" android:layout_centerHorizontal="true" android:layout_centerVertical="true" android:textAppearance="?android:attr/textAppearanceLarge" /> <Button android:id="@+id/button1" android:layout_width="wrap_content" android:layout_height="wrap_content" android:layout_below="@+id/textView1" android:layout_centerHorizontal="true" android:layout_marginTop="36dp" android:text="Start Count Down Timer" /> </RelativeLayout> |
Output:
Finally, run this project.
This is how Android Count Down Timer Code look like.
You can directly copy paste these snippets to your android studio, and they should work perfectly. Just save and run your project. You can also try to play with other countdown timer settings on your own and see the corresponding changes accordingly. There are a variety of properties available which can be changed to make your timer work the way you want it to be.
For a more detailed guide, you can also visit android’s official guide below:-
https://developer.android.com/reference/android/os/CountDownTimer
With this we came to an end of our tutorial. Comment down below if you are facing any problems.


