Image Button Code Snippet for Android Studio
Welcome. In this tutorial you will learn about Image Button in Android Studio.
Image Button Example for Android Studio
An Image Button is a type of Button used in Android Studio which displays an Image in place of the regular button UI. That image is clickable and works exactly like a button, only difference being the UI and the text being displayed on the button. You can even customize it like a button that changes background colours during different background states. There are two ways to set the image:-
1. By using the android:src attribute in XML file.
2. By using the ImageView.setImageResource() method.
Inserting the Image Button in your layout
An Image button can be created in XML (activity_main.xml) layout by using the <Imagebutton> tag as shown below:-
|
1 2 3 4 5 |
<ImageButton android:id="@+id/image1" android:layout_width="wrap_content" android:layout_height="wrap_content" android:src="@drawable/ic_users"> |
The image source for the above code is an image placed at the drawable folder with the name ic_users. You can specify your own image at that position.
Adding Function for Button Clicks
The OnClickListener is a function which is used to capture the event of clicking on a Image button and performing the desired task after the button is being clicked. To create this event handler, first create a View.OnClickListener object and then assign it to the Button by calling the setOnClickListener function. The corresponding function code for MainActivity.java file is shown below:-
|
1 2 3 4 5 6 7 |
ImageButton = (android.widget.ImageButton) findViewById(R.id.image1); ImageButton.setOnClickListener(new View.OnClickListener() { public void onClick(View v) { Toast.makeText(ImageButton.this, "Thank You for clicking this picture", Toast.LENGTH_LONG).show(); } }); |
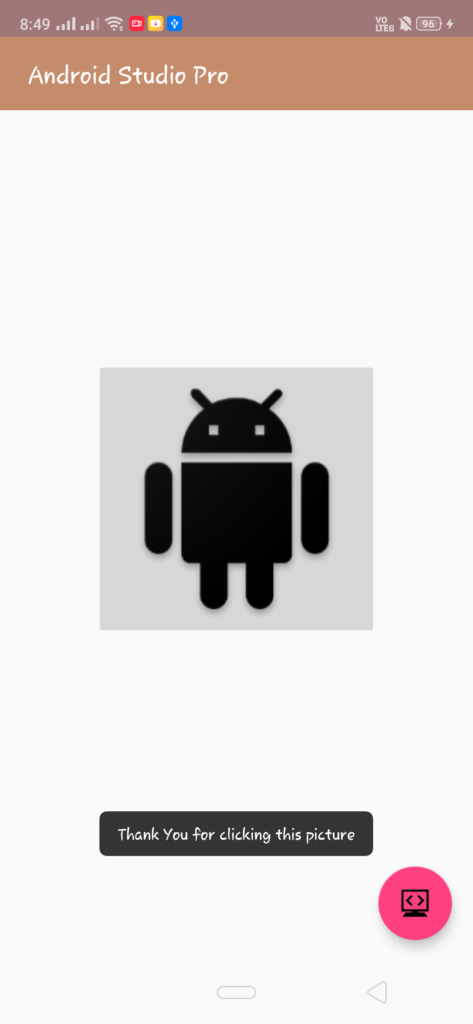
The above code will create a variable of type Image Button and then call the OnClickListener to capture the event of that button being clicked. Once the event is captured,it will show a Toast on the screen, with the message “Thank You for clicking this picture”, once the user clicks on the button.
A sample image button is shown in the below picture. The button when clicked will display the message “Thanks for clicking this picture”.
The Full Java Code along with the XML layout for the above example is shown below:-
JAVA (MainActivity.java)
|
1 2 3 4 5 6 7 8 9 10 11 12 13 14 15 16 17 18 19 20 21 22 |
import android.app.Activity; import android.os.Bundle; import android.view.View; import android.widget.Toast; public class ImageButton extends Activity { android.widget.ImageButton ImageButton; @Override protected void onCreate(Bundle savedInstanceState) { super.onCreate(savedInstanceState); setContentView(R.layout.activity_image_button); ImageButton = (android.widget.ImageButton) findViewById(R.id.image1); ImageButton.setOnClickListener(new View.OnClickListener() { public void onClick(View v) { Toast.makeText(ImageButton.this, "Thank You for clicking this picture", Toast.LENGTH_LONG).show(); } }); } } |
XML (activity_main.xml)
|
1 2 3 4 5 6 7 8 9 10 11 12 13 14 15 16 17 18 19 20 21 |
<android.support.constraint.ConstraintLayout xmlns:android="http://schemas.android.com/apk/res/android" xmlns:app="http://schemas.android.com/apk/res-auto" xmlns:tools="http://schemas.android.com/tools" android:layout_width="match_parent" android:background="#F2F2F2" android:layout_height="match_parent" tools:context=".ImageButton"> <ImageButton android:id="@+id/image1" android:layout_width="wrap_content" android:layout_height="wrap_content" android:src="@drawable/ic_users" app:layout_constraintBottom_toBottomOf="parent" app:layout_constraintEnd_toEndOf="parent" app:layout_constraintStart_toStartOf="parent" app:layout_constraintTop_toTopOf="parent" /> </android.support.constraint.ConstraintLayout> |
You can directly copy paste these snippets to your android studio, and they should work perfectly. Just save and run your project. You can also try to play with these other settings on your own and see the corresponding changes accordingly. There are a variety of properties available which can be changed to make your Image button more materialized and fancy looking.
For a more detailed guide, you can also visit android’s official guide below:-
https://developer.android.com/reference/android/widget/ImageButton
Comment down below if you are facing any problems.

