
Floating Action Button (FAB) Code Snippet for Android Studio
Welcome. In this tutorial you will learn how to add a Floating Action Button in your Android Devices.
Android Floating Action Button (FAB) Example
Floating Action Button (also known as FAB) is a special type of button in Android that is generally circular and is displayed at the bottom as a small round button. They are used to trigger special type of action in your app’s UI. In this page you will learn how to add a Floating action button to your android’s UI and also how to perform an operation when the button is tapped.
Inserting the Floating Action Button in your layout
To create a floating action button, just add these lines of code to your XML file:-
<android.support.design.widget.FloatingActionButton
        android:id="@+id/fab"
        android:layout_width="wrap_content"
        android:layout_height="wrap_content"
        android:src="@drawable/codeg"
        android:layout_gravity="bottom|end"
        android:layout_margin="@dimen/fab_margin"
        app:srcCompat="@android:drawable/ic_dialog_email" />
Floating action buttons come in two sizes: a default one and a mini size which can be changed with the fabSize attribute.
You can also change other properties of the floating action button like the ripple color using the app:rippleColor attribute or the fab icon, using the android:src attribute.
Adding function for the Button Taps
You can respond to the button taps by adding a setOnClickListener, which will respond to button taps. The source code for example is shown below:-
 FloatingActionButton fab = (FloatingActionButton) findViewById(R.id.fab);
        fab.setOnClickListener(new View.OnClickListener() {
            @Override
            public void onClick(View view) {
                Snackbar.make(view, "Floating action button is working", Snackbar.LENGTH_LONG)
                        .setAction("Action", null).show();
            }
        });
The above code will create a floating action button and once the user clicks on it, it will display a snackbar on the bottom of the page. You can even add your desired code inside the onClick function.
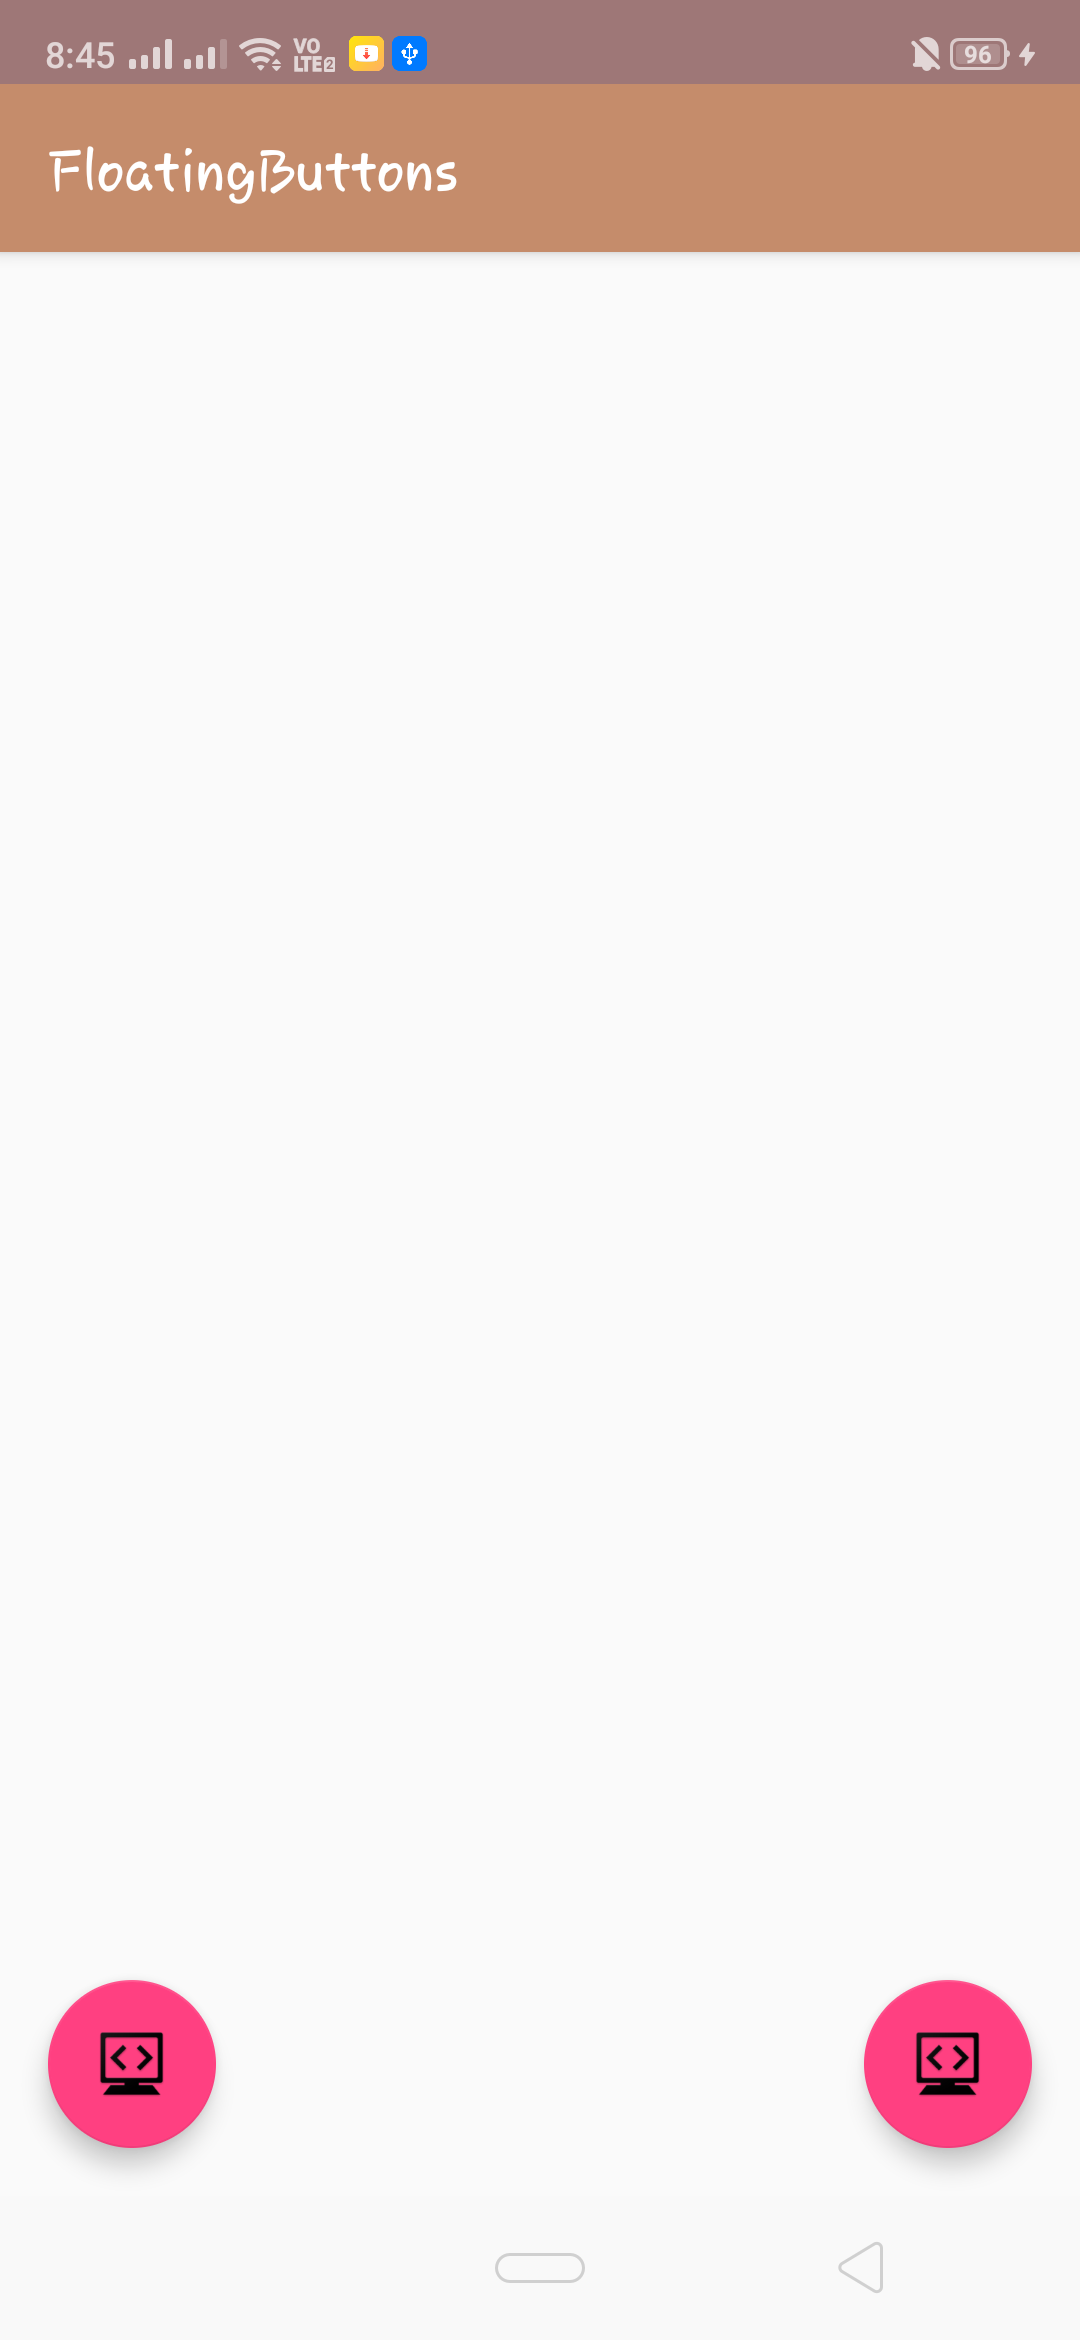
The image below shows a pink colored floating action button which is placed at the bottom.
Once the button is pressed, it will display a snackbar at the bottom like this:-

The Complete Code Snippet for above example is given below:-
Java (MainActivity.java)
import android.os.Bundle;
import android.support.design.widget.FloatingActionButton;
import android.support.design.widget.Snackbar;
import android.support.v7.app.AppCompatActivity;
import android.support.v7.widget.Toolbar;
import android.view.View;

public class FloatingButtons extends AppCompatActivity {

    @Override
    protected void onCreate(Bundle savedInstanceState) {
        super.onCreate(savedInstanceState);
        setContentView(R.layout.activity_floating_buttons);
        Toolbar toolbar = (Toolbar) findViewById(R.id.toolbar);
        setSupportActionBar(toolbar);

        FloatingActionButton fab = (FloatingActionButton) findViewById(R.id.fab);
        fab.setOnClickListener(new View.OnClickListener() {
            @Override
            public void onClick(View view) {
                Snackbar.make(view, "Replace with your own action", Snackbar.LENGTH_LONG)
                        .setAction("Action", null).show();
            }
        });
    }
}
XML (activity_main.xml)
<android.support.design.widget.CoordinatorLayout
    xmlns:android="http://schemas.android.com/apk/res/android"
    xmlns:app="http://schemas.android.com/apk/res-auto"
    xmlns:tools="http://schemas.android.com/tools"
    android:layout_width="match_parent"
    android:layout_height="match_parent"
    tools:context=".FloatingButtons">

    <android.support.design.widget.AppBarLayout
        android:layout_width="match_parent"
        android:layout_height="wrap_content"
        android:theme="@style/AppTheme.AppBarOverlay">

        <android.support.v7.widget.Toolbar
            android:id="@+id/toolbar"
            android:layout_width="match_parent"
            android:layout_height="?attr/actionBarSize"
            android:background="?attr/colorPrimary"
            app:popupTheme="@style/AppTheme.PopupOverlay" />

    </android.support.design.widget.AppBarLayout>
    <android.support.design.widget.FloatingActionButton
        android:id="@+id/fab"
        android:layout_width="wrap_content"
        android:layout_height="wrap_content"
        android:src="@drawable/codeg"
        android:layout_gravity="bottom|end"
        android:layout_margin="@dimen/fab_margin"
        app:srcCompat="@android:drawable/ic_dialog_email" />

</android.support.design.widget.CoordinatorLayout>
You can directly copy paste these snippets to your android studio, and they should work perfectly. Just save and run your project.
For a more detailed guide, you can also visit android’s official guide below:-
https://developer.android.com/reference/android/support/design/widget/FloatingActionButton
Comment down below if you are facing any problems.