Linear Layout Code Snippet for Android Studio
Welcome. In this tutorial you will learn about linear layout in Android Studio.
Android Linear Layout Example
A linear layout is the most simplest or basic kind of layout used in Android Studio.In this layout, all the UI components inside it are either arranged horizontally or vertically one after another. You can specify in which orientation you want the layout to be.. The other most commonly used type of layout is Relative layout.
Inserting a Linear Layout in your app
For inserting a linear layout in your app the <LinearLayout> tag is used, as shown in the example below:-
|
1 2 3 4 5 |
<LinearLayout xmlns:android="http://schemas.android.com/apk/res/android" android:layout_width="match_parent" android:layout_height="match_parent" android:orientation="horizontal" > |
Here you can specify your own layout width and height. You can change the orientation to either horizontal or vertical using the android:orientation property. You can also set a background using the android:background property. Other properties like android:padding, or margin or gravity also work here in the same way as they work for other layouts. You can change the gravity to center if you want all your UI elements inside the layout to be center aligned.
Layout Weight
You can also specify weights to your individual UI elements inside Linear Layout by using the android:layout_weight attribute. This weight is like specifying importance or space allocated for individual UI elements. The child whose weight will be more will use more space inside the layout. That means if there is any empty space, then the UI elements will try to arrange themselves according to the ratio of their given weights. By default, the weight is set to zero for all the elements.
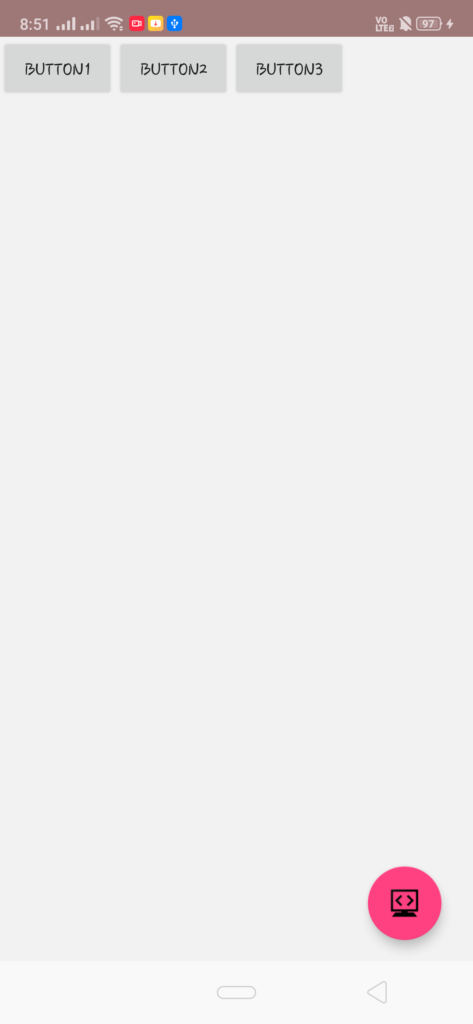
An example of Linear Layout is shown in the image below:-
The Full Java Code along with the XML layout for creating the above layout is shown below:-
JAVA (MainActivity.java)
|
1 2 3 4 5 6 7 8 9 10 11 |
import android.app.Activity; import android.os.Bundle; public class LinearLayout extends Activity { @Override protected void onCreate(Bundle savedInstanceState) { super.onCreate(savedInstanceState); setContentView(R.layout.activity_linear_layout); } } |
XML (activity_main.xml)
|
1 2 3 4 5 6 7 8 9 10 11 12 13 14 15 16 17 18 19 20 21 22 23 24 25 |
<LinearLayout xmlns:android="http://schemas.android.com/apk/res/android" android:layout_width="match_parent" android:layout_height="match_parent" android:background="#F2F2F2" xmlns:tools="http://schemas.android.com/tools" tools:context=".LinearLayout" android:orientation="horizontal" > <Button android:id="@+id/Button1" android:text="Button1" android:layout_width="wrap_content" android:layout_height="wrap_content" /> <Button android:id="@+id/Button2" android:text="Button2" android:layout_width="wrap_content" android:layout_height="wrap_content" /> <Button android:id="@+id/Button3" android:text="Button3" android:layout_width="wrap_content" android:layout_height="wrap_content" /> </LinearLayout> |
You can directly copy paste these snippets to your android studio, and they should work perfectly. Just save and run your project. You can also try to play with various other layout settings on your own and see the corresponding changes accordingly. There are a variety of properties available which can be changed to make your UI more interesting.
For a more detailed guide, you can also visit android’s official guide below:-
https://developer.android.com/reference/android/widget/LinearLayout
Comment down below if you are facing any problems.

